Image by Annette Meyer from Pixabay
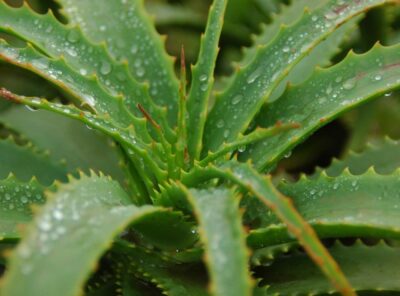
How To Clone Succulents. Succulent plants are members of the cacti family. They store water in their stems, leaves, and flowers. These easy-to-care-for plants live without much attention and require little fertilizer. You can clone succulents to save money and grow bigger plants faster than starting from seed.
1. Wash a knife in soap and water.
2. Dip the knife in bleach mixed with nine parts of water to sterilize it.
3. Rinse the knife off in clean water.
4. Cut the stem just above the soil level. This will allow room for roots to form.
5. Remove the bottom leaves.
6. Carefully cut away the rest of the leaves.
7. Place the plant on its side to see the root area.
8. Use your fingers or a spoon to remove any dirt around the base of the plant gently.
9. Gently pull up the top layer of soil.
10. Cut the stem about 1/2 inch below the soil line.
11. Make sure there is enough space between each piece of stem.
12. Insert the tip of the knife into the center of the stem.
Table of Contents
Cutting
It was always a tradition for my mother to tell me throughout my childhood how easy it was to grow plants from leaves and stems. She showed me how she did it, and I thought it sounded simple. So I tried it out myself. And, well, it worked! So now I’m sharing her secret with you.
Here’s what you do: Cut a small piece of green leaf or stem from a plant sitting around for a while. It is not necessary to get every little speck of dirt off—it won’t make much difference. Then place the piece of leaf or stem onto a paper towel and cover it entirely with another paper towel. Keep doing this until you’ve got a thick layer of dried leaf or stem. Then, you’re ready to start rooting.
You want to take some old newspaper and roll it into a tube shape. Place the rolled-up paper inside a plastic bag. Put the whole thing in a warm, sunny spot where it gets lots of light. If you don’t have sunlight, put it under a lamp.
After a few days, you should notice tiny brown spots forming on the paper. These are your beginnings. They look like little pieces of bark. This is called “cutting.” You know you’re almost there when you see those little bits of bark.
Now it’s time to transplant. Take the paper tube out of the bag and unwrap it. Unroll the paper and gently unstick the pieces of bark from one side of the paper. Be careful not to tear the paper. Gently peel the paper away from the new root system.
Put the entire root system in a pot filled with soil. For a plant to grow properly, it is essential that a good amount of water should be provided to the plant and then allowed to sprout.
You might want to add fertilizer now.
e cloned succulents in bright light and mist regularly.
18. Once they start growing, move them to a shaded spot.
19. When they reach 2 inches tall, pinch out the tips of the new growth.
20. Continue pinching back the tips every few weeks.
21. If you want to increase the size of your clones, simply repeat these steps.
2. Root Separation
When you buy a houseplant, it usually comes pre-divided. In fact, this is great because it prevents you from having to do much work once you bring home your new addition. But what happens if you want to divide one of those plants again later down the road? The roots are left behind when you separate a plant into multiple pieces. And while some people think it’s okay just to toss the seeds out, there’s a better way.
Root separation is a technique used to keep plants healthy and happy. Most gardeners know about it, but many might not realize how important it is. To help you understand why separating the roots is such an effective method, here’s everything you need to know about root separation.
What Is Root Separation?
The process of root separation involves taking apart a plant that has already been divided to get all of its parts back together again. It’s a simple concept that can be very beneficial for your succulent collection.
Why Do You Want to Separate Roots?
If you’ve ever bought a houseplant from a store or nursery, you were given instructions on how to care for it. They probably told you the first thing they told you was that you needed to water your plant regularly. In spite of the fact that this may seem like common sense, it’s actually more than that.
If you’re watering your plant too often, it will dry out. As it dries out, it won’t absorb as much water, which means it’ll lose even more moisture. This could lead to problems with your plant, including wilting and dying.
But when you remove the roots, you remove the part of the plant that needs to be watered. So by removing the roots, you can avoid over-watering your plant.
Separating the Roots Helps Your Plants Grow Stronger
Another reason you should separate the roots is that it helps your plants grow stronger. If you leave them attached, the roots become weak and wilt quickly. By separating the seeds, you give each piece of the plant its source of nutrients.
This allows the plant to continue growing strong and healthy. Plus, it also makes it easier to move around. For example, you can place your plant in a pot without worrying about damaging the roots.
A Feast for the Eyes
Succulent gardens are beautiful, but there’s something about seeing them up close that makes them even better. Whether looking at one plant or a collection of dozens, it’s hard to resist getting closer to see what lies beneath those leaves.
“xeriscape” refers to landscaping explicitly designed to thrive without much water. In addition to succulents, some examples include rock gardens, gravel paths, drought-resistant shrubs, and low-water containers. Xeriscapes use less water than traditional landscapes but still require regular watering.
Be Fruitful and Multiply
Plants such as succulents are considered to be one of the easiest to grow. They require little maintenance and don’t take up much space. You should know, however, that there are a few things you need to consider when propagating succulents.
The first thing you’ll want to do is make sure you’re starting from healthy seedlings. If you’ve got a few stems from the soil, they probably came from a seed. You can tell because the leaves look like the ones you see on mature plants. You’re looking at a seedling if you see tiny white flowers on those stems. To propagate, simply cut off what you think is the plant’s stem. You’ll notice that the roots will keep producing new growth. Cut the rest of the stem off just above the root ball. Now you’ve got a whole new plant.
If you’re starting from seeds, you’ll need to wait until the seeds sprout. This usually takes about three weeks. When they do, gently separate them from each other. Then place them in a glass container filled with potting mix. Keep the seeds moist, but not wet. Overwatering can cause mold and rot. After about four weeks, you’ll have small green shoots emerging from the bottom of the container. These are called “cotyledons.” Once they reach about half an inch long, you can transplant them into individual pots.
Now you’ve got yourself a bunch of baby plants. You can let them sit in a sunny window or put them outside in a warm spot. In about six months, they’ll flower and fruit. At that point, you can harvest the fruits and dry them for later use. Or you could give them away as gifts. Either way, you’ll end up with a lot more plants.
You can also propagate succulents by taking cuttings. Simply remove a leaf from a young plant and stick it in a glass of water. The leaf will absorb moisture and begin to form roots. As soon as it does, you can transfer it to fresh water. It’s essential to leave the cutting alone for a while before putting it in water. Otherwise, the roots may get too big and start to break apart.
Once your cuttings have rooted, you can move them to a larger container. Water regularly, but don’t overwater. Don’t be afraid to prune back any dead parts. That’s how most succulents grow naturally. Eventually, you’ll have a full-grown plant.