Table of Contents
How To Grow And Harvest Bell Peppers
Sweet bell peppers are popular in vegetable gardens since they make such attractive plants and produce lovely, crunchy, flavorful fruits to eat raw or cooked. Yes, we did say fruits, not vegetables! However, we commonly call Vegeta fruits; count bell pepper as one of these surprising “fruits.”
Whether it’s tacos, pasta, salad, or omelet, bell peppers can brighten up many dishes and add a fresh, crisp flavor. If you’re planning to grow bell peppers in your backyard, you should pick up some helpful info before getting started. Continue reading to learn how it’s planted, how you can help it thrive, and when it is harvested.
Choosing Bell Pepper Varieties To Grow
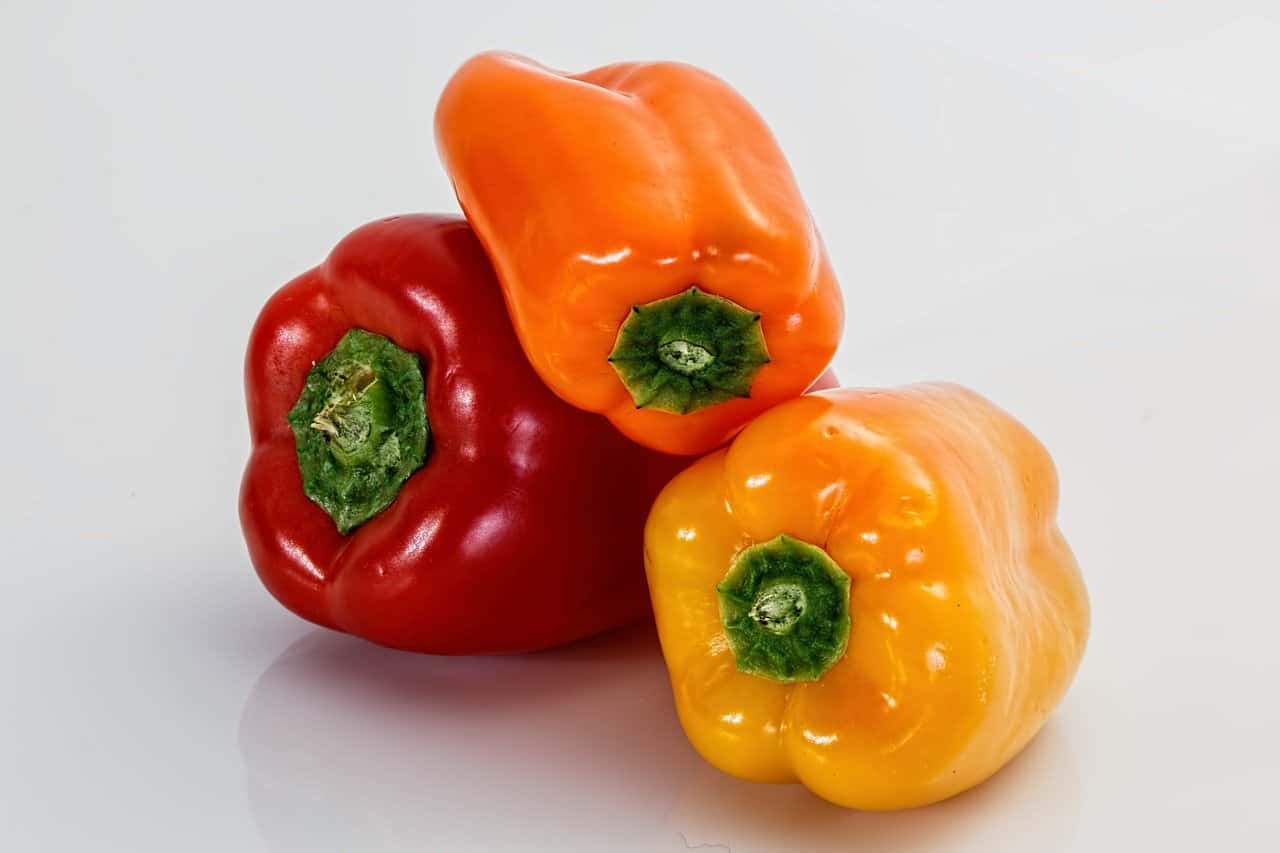
One of the best things about growing bell peppers at home is that you get to choose some unique varieties in vibrant colors, otherwise unavailable in grocery stores or even the farmer’s market.
Here are some of the garden favorites, along with the color of their mature fruits:
- Canary Bell (yellow)
- Big Red (red)
- California Wonder (can be picked while green or left to turn red)
- Lipstick (can be picked green or waited to turn red)
- Orange Sun (orange)
- Coral Bell (orange)
- Chocolate Beauty (brown)
- Purple Beauty (purple)
When To Plant
Bell peppers are warm-season crops with a long growing season. It can take anywhere between 60 to 90 days for the fruits to mature from when you plant the seeds.
According to the University Of Illinois extension, they are best started indoors, somewhere in late winters, and then transplanted into the garden once the soil warms up in spring. The young plants won’t tolerate frost and are not suited to growing in cold, wet ground.
Fill a planting tray with soil and plant the seeds to a depth of ¼ inch. Mistake the ground and give it a temperature of at least 70°F for germination. You can place it over a heating pad or on top of the refrigerator to produce a warm environment for ideal germination.
Prepare The Site
While the seeds germinate, you can find a suitable spot in your garden where you’ll transplant the seedlings. Bell peppers like to grow in full sun in well-drained, fertile, sandy loam with a pH between 6.5 and 7. Choose a spot that hasn’t recently been used to produce members of the nightshade family, including eggplants, tomatoes, potatoes, or peppers, since it can make them prone to diseases.
The best time to amend the soil with compost or well-aged manure is in the fall since it gives plenty of time for the organic matter to work into the ground and enrich it with nutrients for the new plants.
Bell peppers can also be grown in containers, with just as successful outcomes as you’d expect in a garden bed. Choose a pot with drainage holes at the bottom and is at least 12 inches deep and 12 inches wide. You can grow 2 to 3 plants per pot of this size, but choose a smaller variety of bell pepper. Fill the pot with some good quality, well-draining potting mix before planting.
When And How To Transplant
Bell peppers are very prone to transplant shock. You’ll have to start hardening off the plants ten days before you plan on transplanting them into the garden. Start placing the planting tray outdoors, for a short period initially, and gradually increasing their outdoor time each day until they’re ready to go in the garden bed.
Once the soil temperatures reach at least 65°F, your seedlings can be planted outdoors in the bed. Northern gardeners can mulch the ground with black plastic to warm up the soil.
Transplant them 18 to 24 inches apart, in holes only as deep as the root ball. Make sure the seedling leaves are still above the ground. Water the transplants and add a one or 2-inch layer of organic mulch around the base. This will help retain moisture in the soil and maintain a comfortable environment for the roots.
Care Tips For An Abundant Harvest
Once your young plants are in their permanent home, all they need is good care to make sure they’re healthy and productive. Here are some tips:
● Watering
Consistent moisture produces excellent bell peppers. If the soil isn’t evenly dry, you’ll find smaller, weaker fruits. Water deeply at least once a week, careful not to drench the foliage. You may need to water more often if you live in a warmer climate. Maintain a few inches of organic mulch over the soil to help retain moisture, especially in warmer conditions.
● Weeding
Organic mulch will effectively suppress much of the weed growth. However, keep an eye on weeds throughout the growing season and remove them by hand or using a garden hoe. Only work close to the surface to remove the weeds, not disturbing the plants’ roots.
● Fertilize
Fertilize right after the first fruit set with a low-nitrogen fertilizer. Don’t choose a high-nitrogen fertilizer since it will boost the foliage growth at the expense of fruit production.
● Support
Though not necessary, adding a stake or cage can help keep the plants upright for better exposure to sunlight and off the ground. In addition, it will encourage the healthy development of plants and prevent diseases.
● Good Companions
Carrots, cucumbers, squash, radishes, eggplant, and alliums do well with bell peppers. Spinach, chard, and lettuce are excellent to plant alongside peppers. If you want to add flowers, choose geraniums, petunias, or nasturtiums to grow with bell peppers. However, the Brassica family and fennel members shouldn’t be planted anywhere near bell peppers.
Watch Out For Pests
Aphids, flea beetles, stink bugs, root-knot nematodes, spider mites, and cutworms are common pests that can bother your bell pepper plants. Hose them off with water, hand-pick and destroy them, or spray the plants with horticultural oils to get rid of the critters. Applying insecticidal soap can also ward off pests.
Common Plant Problems
Bell peppers are sensitive to both overwatering and underwatering. In addition, root rot and phytophthora blight, a fungal disease, are linked to wet soil. Blossom end rot is another problem that results from moisture stress. Other than that, those who smoke should wash their hands before working on pepper plants since the plants are susceptible to the tobacco mosaic virus.
Planting disease-resistant varieties and crop rotation can help prevent many common problems. A code is usually printed on the seed packet to highlight the resistant diseases. For example, the code HR: TEV will mean that the variety is highly resistant to the tobacco etch virus.
Time To Harvest Fresh Homegrown Bell Peppers!
Harvest is the perfect end to a successful growing season. Finally! It’s time to pick some healthy, crunchy, fresh bell peppers! If everything went smoothly during the growing season and plants received optimal growth conditions, you should find abundant plump, firm peppers hanging from the branches.
When To Harvest
The best time to pick the fruit varies with your preference. You can either like green peppers once they’re the right size or wait for them to change color. The longer they stay on the plant, the sweeter they’ll get, and the Vitamin C content will also increase, not to mention the vibrant colors you’ll find – red, yellow, orange, purple, and even chocolaty brown!
How To Harvest
Cut them off the plant with a sharp knife or shears, taking care not to disturb the plant or any nearby fruits that are still developing. As you harvest, the plants will continue flowering and setting more fruits.
How To Store
They’re the crispiest and tastiest when consumed fresh. You can store peppers for a week or more in the refrigerator. Store them dry; you can wipe off any dirt with a dry cloth. Wash once you’re ready to use them. Damp conditions can speed up the rotting of your harvest.
How To Use
They’re perfect for cheese omelets, pizzas, pasta, and fajita. If you want your harvest to be the star of the dish, try stuffed bell peppers – tuna salad stuffed bell peppers, mac, and cheese stuffed bell peppers, lentil stuffed bell peppers, and more! Roasted bell peppers make great dips. Try this roasted red pepper dip.
Conclusion
Growing bell peppers at home are exciting and rewarding. Once you see the plants laden with beautiful peppers, you’ll instantly know that all that effort you put into planting and caring was utterly worth it. Follow the essential tips we’ve mentioned in the post, and you’ll have some fresh, crunchy peppers in your kitchen in just a few months!
